Replaced content with "{{:Data:Getting Started}} == Tips from players == <!-- This part is yours: add your own tips here. The guide above is kept up to date by the addon. -->"
<!-- This part is yours: add your own tips here. The guide above is kept up to date by the addon. -->
** The <b>W</b> and <b>S</b> keys allow you to move foward/back, while <b>A</b> and <b>D</b> turn you left/right.
** Q and E keys allow you to strafe left/right.
** Home key will enable autorun. Press again to disable.
** F11 allows you to go fullscreen if the game hadn't done so so automatically.
** These controls are not set in stone and can be modified in Options > Controls
** You can also modify what key will target the next enemy, auto run, loot, etc.
* <b>Mouse</b>
** You can also use the mouse to control your character.
** Hold down the right mouse button and move your mouse left and right to rotate. You can do this while using your keyboard to move forward/backwards.
** Hold down the left mouse button and move your mouse left and right to rotate the camera around your characer.
** Hold down the left and right mouse button at the same time to move forward. You can also move the mouse left and right to rotate while doing this.
[[File:Controlscreen.jpg|thumb|300px|none|<b>You may adjust to your style as needed</b>]]
==Non Playable Characters (NPC's)==
[[File:Npcguide.jpg|300px]]
* There are as many allies as there are foes and friendly npcs cannot be attacked.
** Some of these npcs give you quests while others only exist to converse with.
** Some npcs may even be merchants selling gear or important quest items.
** Hostile npcs exist only to be slain and will generally attack when you are near them.
* To interact with friendly npcs, you must click on them while being close enough.
** If you're too far away from the npc you'll only see their status bar.
** Hostile enemies usually target you first, which will automatically let you see their status bar.
** If you want to check an enemy without engaging in battle, click on them from afar
==Combat==
Combat is in real time and the enemy will not wait to attack.
To attack, first target your enemy by clicking on them. You can also target nearby enemies by pressing the TAB key. Press TAB again to focus the next closest enemy. You can hold down SHIFT to cycle in the reverse order.
Once you have selected your target their stat bar which contains there health, mana/rage and other attributes will show up next to ours. Now you are ready to use your abilities.
* You must be close enough to the target to activate the ability and has a specified range
[[File:Skill Not Ready.jpg|thumb|none|100px|Not Ready]]
* Depending on your class you will have and unlock different types of abilities.
** <b>Melee</b>: Every class has a melee ability that does damage without costing any mana/rage.
** <b>Magic</b>: Priests and Philosophers have magical attacks which are boosted by their intellect.
** <b>Physical Attacks</b>: Assassins and Titans have a variety of physical attacks to destroy their enemies with. These are boosted by their strength.
** <b>Heals</b>: Some classes have the ability to heal themselves and their party members. If targeting an enemy, casting a heal will heal yourself.
* Some abilities may work differently
** <b>Aoe</b>: Some abilities can target multiple players, friends and foes alike
** <b>Dot</b>: Some abilities deal damage or heal over time.
*** Tick: One tick equals 5 seconds. Dot abilities are essentially run by ticks.
* Some abilities don't deal damage but have different effects
** <b>Buff</b>: Abilities that target the players themselves. Some can be cast on other players.
*** Shield: A Buff that protects the player from enemy attacks.
** <b>Stun</b>: Some classes have abilities that can stun the enemy.
** Unique: There are two abilities that don't fit any category
*** Taunt: An ability that provokes an enemy to attack you
*** Balance: An ability that costs health but recovers mana
[[File:Ability List.jpg|thumb|none|600px|List of Abilities]]
* Your abilities are placed on the left hot bar
** You can either click the button or press the related number key to attack.
** Abilities will become greyed out when you are unable to use them.
Fulfill your duty as a Titan of Time by helping fellow NPCs.
*Quests reward you with not only the satisfaction of altruism but also Xp, Gold, Points, and sometimes even gear.
**Some quests must be completed to being other quests down the line.
===Quest Type===
*Quests are separated into different categories
**<b>Non-Repeatable</b>
***Quests you can only repeat once are non-repeatable
***Each area has a similar set of Non-Repeatable quests that require you to kill certain enemies
****This also includes quests that require you to enter that area's Temple
***Non-Repeatable quests are the only quest that can reward you with gear
*<b>Repeatable</b>
**Quests you can repeat a few times are Repeatable
**Repeatable does not mean infinitely repeatable
**These are often grind quests that reward decent Xp and Points.
*<b>Daily</b>
**Quests you can complete once a day are Daily
**Almost every area in the game has a Daily quest you can complete
**They reward 10 points and a set Xp and Gold
***One Daily quest can reward a whopping 300 points, but it's near the end
===Other quest info===
*Some quests require items that you have to purchase from other NPCs
**This can cost gold, but can also require other items to trade with
**These items can usually be obtained as loot from a slain enemy
*Some enemies and items you can pick up can only be seen after starting a quest
**In a party, you can see them if another player had started the quest
**This applies even after you complete that quest
*Quests aren't usually required to access other areas, but there is a "Main Quest" line
**These quests must be completed in order to gain access to the final areas
**I recommend completing every quest you can find to avoid encountering any road bump
==Inventory==
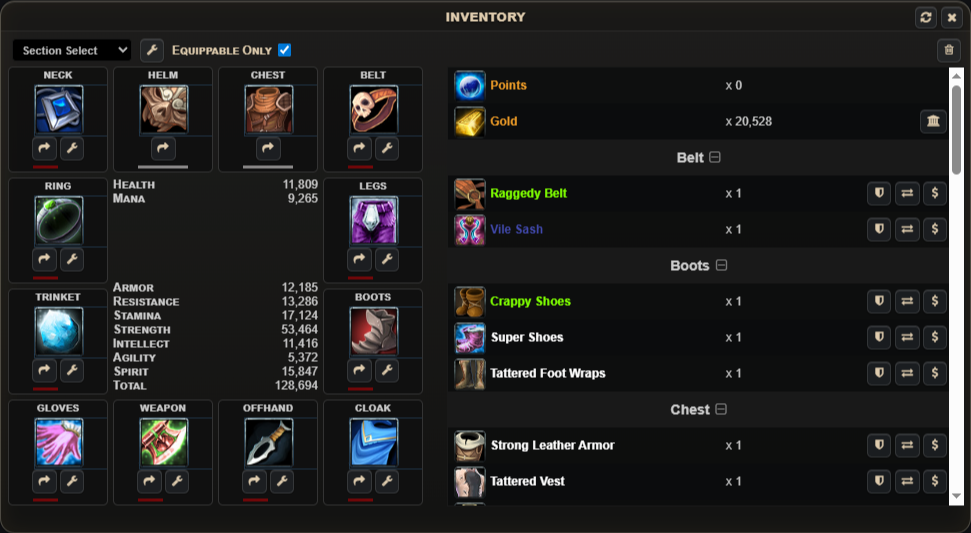
[[File:inventory.png|thumb|none|700px|Inventory]]
* Your inventory stores all of your items. There are a few things you can do here.
** <b>Equipping Items</b>: Your gear is shown along with the inventory and you equip your items through the inventory.
*** The <b>Shield</b> icon next to the item allows you to equip it.
*** The 90 degree <b>Arrow</b> icon under your equipped gear allows you to unequip it.
** <b>Repairing</b>: Every time you die you will have the option to repair your gear.
*** You will see a <b>Wrench</b> icon labeled "Repair all" in the middle of your gear interface.
*** Repairing gear costs a small amount of gold
*** You will need to repair gear, as equipment with 0 durability will not function.
** <b>Item Functions</b>: Other than equipping, items may also have other <b>Actions</b>
*** Consume: Items with a <b>Potion</b> icon can be consumed, usually recovering your health and mana/rage.
**** Stat potions temporarily raise your stats while the Hearth Scroll can be consumed infinitely to take you back to the tavern.
*** Transfer: Items with a <b>Double Arrow</b> icon can be transferred. Items that can be transferred have 3 different options
**** Legion: You can transfer an item into your legion, where it can be stored in your Vault.
**** Player: You can transfer an item directly to another player. (might be bugged)
**** Auction: You can transfer an item to the auction, where it can be bid on by other players for gold.
*** Sell: Items that have the <b>Dollar Sign</b> icon can be sold. The amount of gold you can obtain will be labeled by "Value"
**** Be careful what you sell, as you may not be able to obtain them again.
===Items===
* Within the Inventory you can see many categories of items.
** <b>Special</b>: This contains your points and gold.
** <b>Equipment</b>: You will see all your equipment in different tabs (Belt, Boots, Chest, etc.)
** <b>Consumables</b>: Any items that can be consumed will be in this section.
** <b>Gems</b>: Any gems you can socket into your gear, granted it has an empty slot, will be in this section.
** <b>Misc</b>: Any items that don't fit in any of the other sections. There are quite a few.
*** <b>Junk</b>: Any items that serve no purpose other than to be sold will be labeled in grey text.
*** <b>Quest</b>: Items that are required to complete quests. They generally cannot be sold or transferred.
*** <b>Key</b>: A Key item (pun intended) that allows you to enter areas normally locked. Some keys also count as a quest item.
*** <b>Material</b>: Whether it be a cooking ingredient or herb, they will be listed here. Some fish or herbs don't really serve a purpose and act no differently than junk items.
* Consumables work like Abilities and can be placed on the right hot bar.
** This allows you to quickly consume an item without directing accessing the inventory.
** You can only click on the button to consume the item.
** Items you cannot use yet are greyed out just like abilities
[[File:itembar.png|thumb|none|548px|Itembar]]
==Aquiring Loot==
Enemies may or may not drop items, which appear as chests. Loot can also be purchased from Merchants, through trade with other players, or given out as a reward by quest giving npcs
[[File:Chest.jpg|thumb|none|100px|Spoils of war]]
Items dropped by enemy npcs may be acquired either by clicking on the chest or by the Loot control, in which the items will be acquired automatically.
You may learn [[professions]] to create or gather your own items! These skills are leveled up through repeated works. In other words, to raise your fishing level, for example, you must continue to catch more fish. When you cannot level up anymore, you must continue to fish in higher-level areas.
==Spellbook==
* The Spellbook are where your abilities come from.
** You can access the spellbook through Manage > Spellbook.
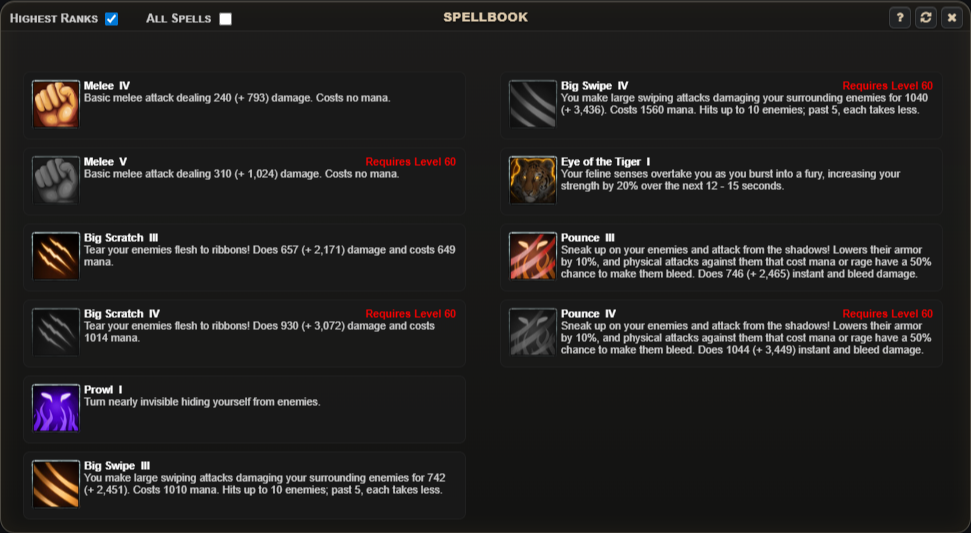
** You can click "Highest Rank" to see your highest-ranked abilities and the next unlockable rank.
** "All spells" show all of your abilities and ranks.
** As you level up, you will gain access to new abilities and ranks.
*** You will have to learn them manually as each new ability/rank has a cost.
* To add a new ability, click on the ability from the spellbook, you can then drag and place it on the desired spellbar spot.
* To remove the ability, click on the ability from the hot bar and then click anywhere outside the spellbar.
[[File:spellbook.png|thumb|none|700px|Spellbook]]
==Training==
[[File:Training.jpg|600px]]
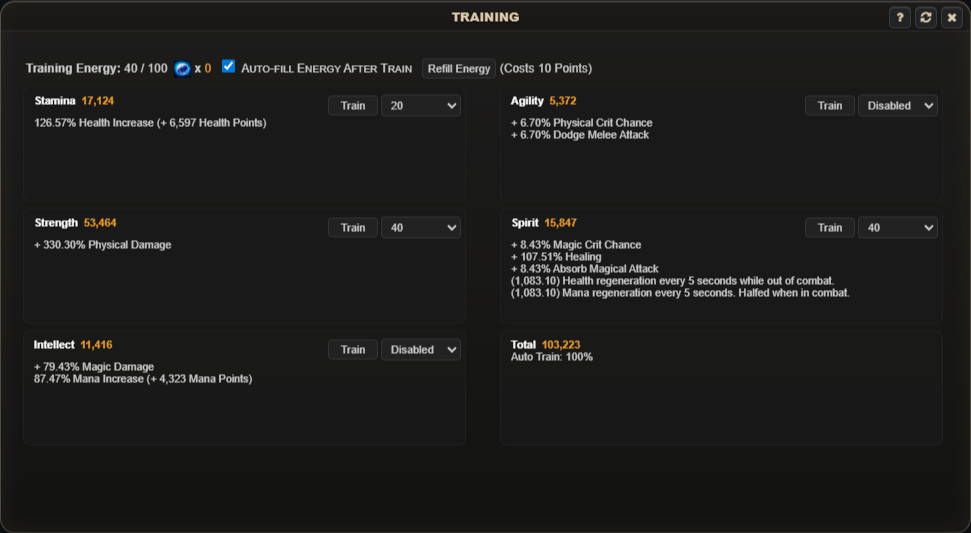
The only way you can increase your stats is to equip higher level gear or through the training screen.
*Every 2 minutes you regenerate 10/20 energy (depending on exalted player status)
**Energy caps at 100 energy and is used to raise your attributes
**Training uses up all the energy you have
*Every class has a set of attributes that increase their effectiveness in battle.
*Points can be earned daily through Daily Quests, Vote for Rewards, and Tomb Raiding.
**Points instantly raise your attributes equal to 100 energy's worth.
**Both Vote for Rewards and Tomb Raiding can be accessed through Activities as well.
**You can also gain points through regular quests and by becoming a Titan of Time.
Training increases your base attribute number, while gear multiplies those attributes by a percentage. So if you have 1000 stamina and a Chest with a 10% stamina boost, your total stamina will be increased to 1100.
These attributes, in turn, increase your stats, which also work based on a multiplier. You can learn more through [[Classes]]
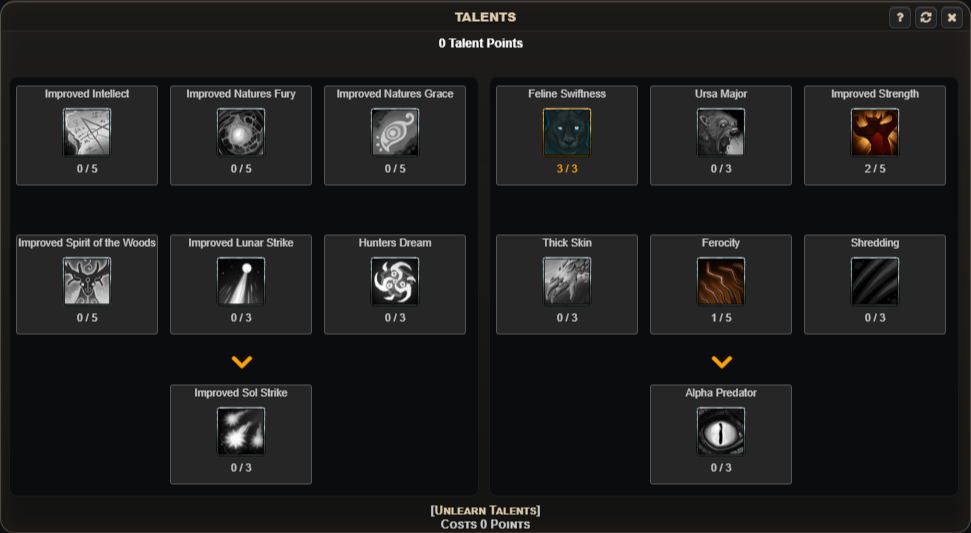
==Talents==
* Each Class also has their own Talent tree, which allow you to further upgrade your character.
** You start with 1 point and gain 1 more every ten levels.
** There are also quests that may award you with talent points as well, so be sure to complete those.
You can reset your talents for free the first time, but every subsequent reset adds an extra 5 point cost which stack additively. So your 3rd reset, for example, would cost 10 points (first reset is free). So be mindful of what talents you want.
[[File:talents.png|thumb|none|700px|Talents]]
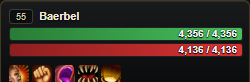
==Pets==
At a certain point, you will be able to purchase pets from an npc.
*You can choose between 3 different pets, but they all more or less function the same.
**Pets have a Summoned a Dismissed hotbar
***The Summoned hotbar shows when you have summoned your pet
****It show the pet attack command, your pet's abilities, and the dismiss button
***The Dismissed hotbar shows when you have dismissed your pet
****It only shows the button to resummon your pet
***Pets must be summoned and alive in order for it to gain Xp
****Quest Xp does not apply to your Pet
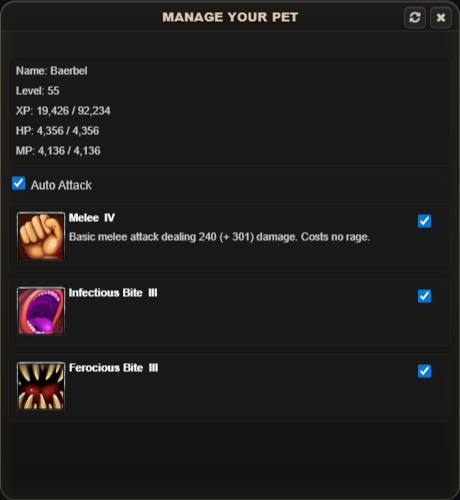
*Pets can help fight with you in battle.
**All 3 pets share the same Pet type, meaning they each have Infectious and Ferocious bite as their abilities.
**Melee is the only ability you can manually tell pets to use, while the other abilities are used automatically.
**Pets have their own Attribute page in which you could raise their attributes
***I recommend only training strength as pets make for terrible tanks.
*Although a cosmetic choice, I suggest you pick wisely as your first decision is final.
Latest revision as of 03:04, 30 October 2026
New to the realm? Every adventure begins in Astari Forest. This page takes you through your first hours there: how to move, what is on your screen, your first fight, your first quests, your gear, and how your Titan grows stronger. Wherever another page has the details, such as a zone's map, a quest's rewards or how fishing works, this page links there. The game has a short guide of its own under Help › Getting Started.
You start in Astari Forest, a quiet wood south of the city of Hallengard. Its page has the map with every exit and every NPC marked, the creatures that live there and what grows and swims in it: keep it open while you play. Your first stop is Lord Tobias, who has your first quest.
Every place in the realm and how to get there: Zones.
Moving around
Keyboard
W / S or ↑ / ↓: move forward and back
A / D or ← / →: turn left and right
Space: jump
Hold Shift: walk instead of run
Enter: open the chat and send
Esc: clear your target
Mouse
Hold the left button and move the mouse to turn your character.
Hold the right button and move the mouse to swing the camera around.
Hold both buttons to run forward; move the mouse to steer.
The mouse wheel zooms the camera in and out.
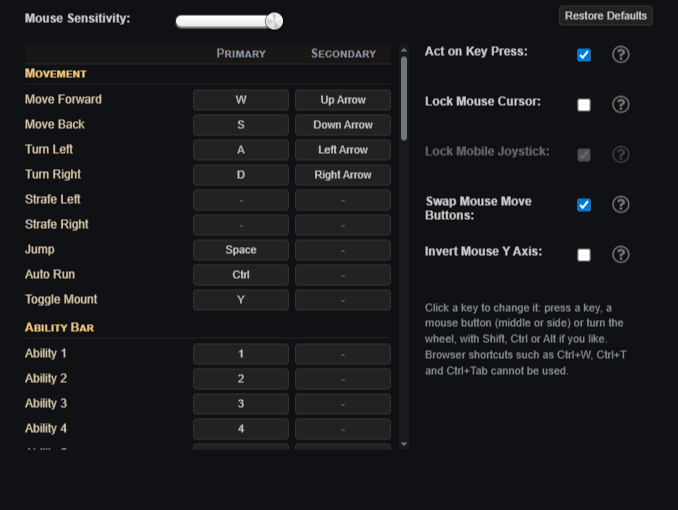
Your own keys: open Settings (the gear button next to the volume menu) › Controls. Every action can have two keys, including mouse side buttons, the wheel and combinations with Shift, Ctrl or Alt. Besides moving, the ability and item bars and targeting, there are keys for Loot All, Look Behind, Overhead Map (hold), Reset Camera, the mount, and every window: inventory, spellbook, talents, quest log, crafting, training and more.
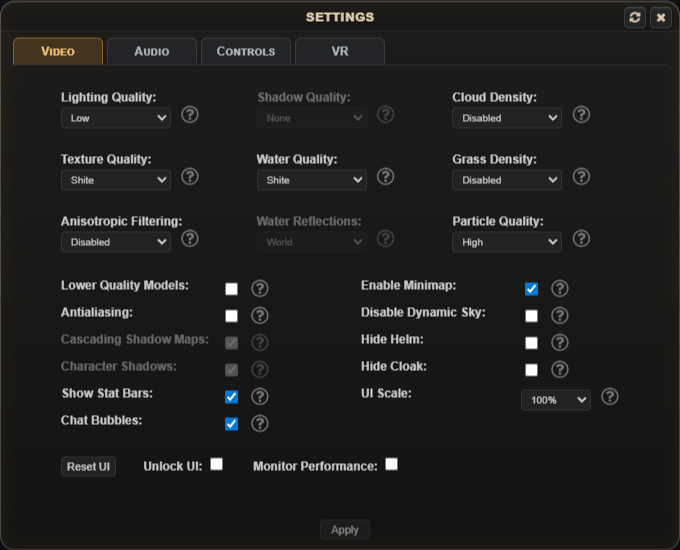
The other tabs of Settings are Video (quality, shadows, water, grass and more: turn things down if the game runs slowly), Audio and VR.
Your screen
You and your target
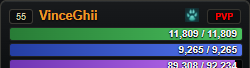
Your own frame shows your level, name, health, mana or rage and experience. Click an enemy and its frame appears beside yours, with its health and more: a good way to size it up from afar before a fight.
Ability and item bars
Your abilities sit on the ability bar, on the number keys (1 to 0). Potions and food go on the item bar, on Shift+1 to Shift+0. Both have more pages, which you can flip through.
The menu
The buttons at the top right open the main menu. Training and Manage are the ones you will use most: Manage holds your Inventory, Spellbook, Talents, Crafting, Quest Log, Pet, Ship, Gold Vault, Legion and the Auction House. Help has the game's own guide, the rules and I'm Stuck! if you ever are.
The quest tracker
The quests you are on, with what each still needs, are listed at the side of your screen, so you rarely need to open the quest log.
Talking to people
There are as many allies as there are foes in the realm.
Friendly NPCs cannot be attacked. Some give quests, some sell gear or supplies, and some just like to talk.
Hostile NPCs exist to be slain, and usually attack when you come near.
Talking to an NPC: walk up close and click on them. Their window shows what they offer: quests, a shop, or both.
Combat is in real time: your enemy will not wait for you.
Targeting. Click on an enemy, or press Tab for the nearest one and again for the next. Shift+Tab goes back to the previous one. Enemies that attack you are targeted automatically.
Attacking. Use the number keys (1, 2, …) or click the buttons on your ability bar. Every ability has a range, so you must be close enough to use it. An ability you can't use right now is greyed out.
Slain enemies may leave a chest behind. Click it, or give Loot All a key and pick everything up at once. What each creature drops, and how often, is on its page.
Quests
Help the people of the realm, and they will reward you with experience, gold, points and sometimes gear. Your first is The Beginning from Lord Tobias, which teaches you to fight; he has more for you afterwards. Each quest's page tells what it asks, what it gives and which quest follows.
Many quests unlock the next one, so a quest line can go on for a while.
Some quests let you choose one item as a reward, on top of the items everyone gets. You pick it when you hand the quest in.
Normal Done once. Every area has a set of them, usually about slaying certain enemies or entering the area's temple. Only these can reward gear.
Repeatable Can be done again, a few more times but not forever. Usually grinding quests with good experience and points.
Daily Marked [Daily]: once a day. Almost every area has one.
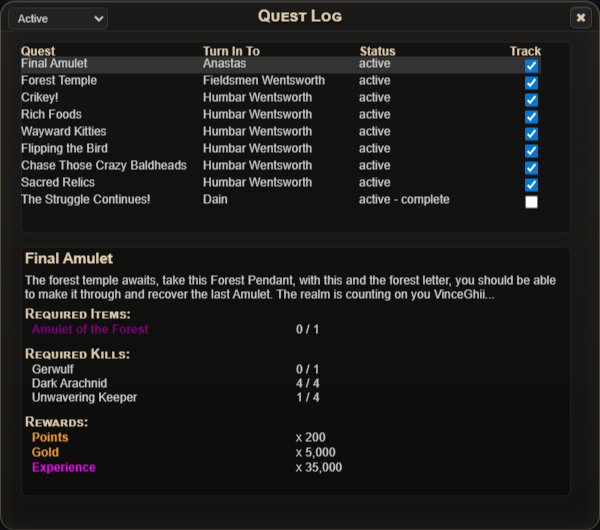
The Quest Log (Manage › Quest Log) lists your quests, Active, Complete, All or Dailies, with whom to hand each in to, and lets you choose which the tracker shows.
Good to know
Some quests ask for items you have to buy from an NPC, for gold or in trade for other items. Those items usually drop from enemies as well.
Some enemies and items only appear once you have started the quest that needs them. In a party you see them if any member has started it, even after you have finished it yourself.
Most areas don't need quests to enter, but a main quest line opens the final areas. Doing every quest you find keeps you from hitting a wall later.
Every quest with its giver, rewards and what follows it: Quests.
Your gear
Quest rewards are your first gear: put it on as soon as you get it. Your inventory (Manage › Inventory) holds all your items, with your equipped gear and your stats beside it.
Equip / Unequip: put gear on or take it off.
Consume: use a potion or food, mostly to restore health and mana or rage.
Sell: sell it for the "Value" shown on it. Sell all junk (the bin at the top) sells every grey item at once. Be careful, as some items can never be found again.
Bank (next to your gold): puts gold in the bank, where it earns interest every day.
Durability: gear wears down every time you die, and gear at 0 durability does nothing. You can repair it for a little gold.
Besides fighting you can gather and make your own items: Fishing, Herbalism, Cooking and Alchemy, all in Manage › Crafting. A profession grows by doing it. Each has its own page with how it works and what you find where, and Crafting has them all side by side.
Temples are dungeons inside the zones, with tougher enemies and bosses, and many quests send you into one. Your first is The Catacombs in Astari Forest, where Merek's Evil Lurks sends you. Inside a temple, the Reset Temple icon lets you start it over. Every temple and where to find it: Zones.
Growing stronger
Spellbook
Your abilities are listed in the spellbook (Manage › Spellbook).
You learn new spells and ranks automatically as you level up. A new rank replaces the old one on your ability bar, and a new spell goes into a free slot on its first page. Ranks you haven't reached yet say at which level they come.
Highest Ranks shows only your best rank of each ability; All Spells shows every rank.
To place an ability: click the spell's picture in the spellbook, then click the spot on your ability bar.
While the spellbook is open you can also rearrange the bar. Otherwise a lock on the bar keeps it from being changed by accident.
Training
Your attributes grow in two ways: training and better gear. Start your training (the Training button) right away, and set up auto-train.
Energy
Training runs on energy, up to 100, which refills over time; Exalted Players refill twice as fast.
Pick a stat to train and your energy goes into it.
Auto-train: set your values once, and the game trains for you whenever your energy is full while you're online.
Points
Refill Energy fills your bar at once for 10 points. With Auto-fill Energy After Train it does so after every training.
Points belong to your account, not your character. You earn them from quests (daily ones included), the Proving Grounds and becoming a Titan of Time.
Training and gear work together. Training raises your base attributes, and gear multiplies them. With 1,000 stamina and a chest giving +10% stamina, you have 1,100 stamina. Attributes in turn raise your stats, again by percentages; see Classes.
Talents
Every class has its own talent tree (Manage › Talents) to make your character stronger.
You get 1 talent point every 10 levels, and each talent costs 1 point. Some quests give talent points too.
Some talents need another one learned first, and you need 5 points in one tier to unlock the next. The left and right halves of the tree count separately.
Some abilities can only be learned through talents.
Resetting talents (Unlearn Talents): the first reset is free. Every reset after that costs 5 points more than the one before (the 2nd costs 5, the 3rd 10, and so on), so plan your tree.
Proving Grounds
Oh boy, it's the Proving Grounds.
The Proving Grounds (I to IV) are sealed arenas hidden throughout the land, so you have to find them yourself. Each has three difficulties: Normal, Hard and Insane. Each gives points and gold once, and finishing a harder one also counts the easier ones.
Moving on
When the forest has nothing left for you, Lord Tobias sends you north with Time To Begin: through the gate to Hallengard, to meet his brother Cassius in the Tavern. There Tina sells the Hearth Scroll, which takes you to your home (chosen with Make Home) once an hour, but not in combat. From the city the realm opens up: see Zones.
Mounts
I'll afford you soon, Dire Snow Wolf.
Mounts are sold in Hallengard by Finn, next to Chef Rake, who sells spices. There are three, each with its own speed: 115, 150 or 190, against your own 100. Press F (the default) to mount and dismount. You can't mount in combat, and getting hit knocks you off.
Pets
Choosing a pet.
Later you can buy a pet for 5,000 gold from a pet vendor: Walter Wentsworth in the Emerald Field, Jagger Wentsworth in the Frozen Wastes or Fallenbahr Wentsworth in the Fertile Lands. You own up to five, one active and the rest in the kennel. A pet has its own bar: you order the attack, it uses its other abilities on its own, and it gains experience only while summoned and alive, never from quests.
Ships
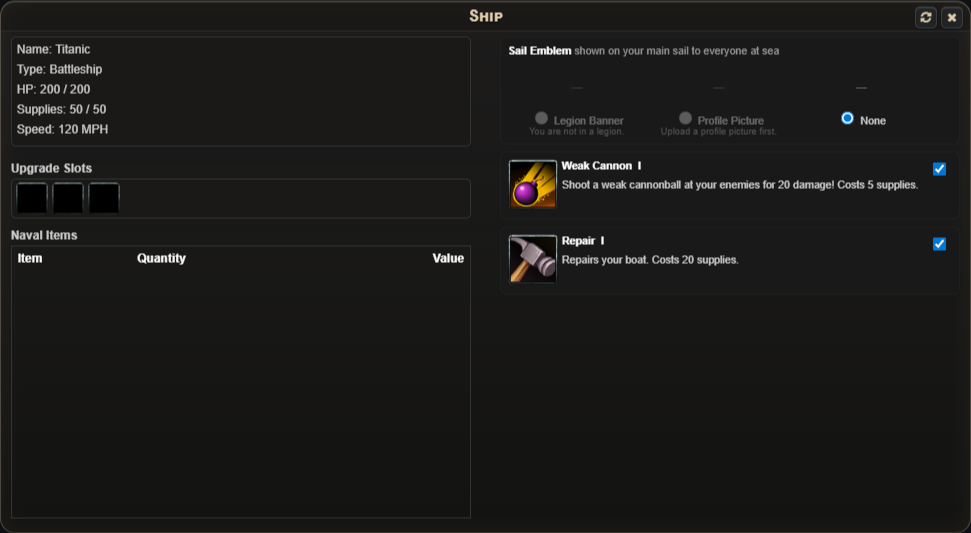
Many places lie across The Undying Sea, and you sail there in your own ship (Manage › Ship), with its hit points, supplies and upgrades.